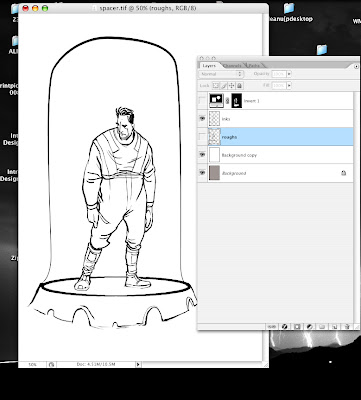


My set up is to have the bottom layer be white.
then i create my drawing inking group.
Into the group goes gray on bottom, so i don't have to draw on white, blank layer for the rough, blank layer for the inks. Then an adjustment layer that is set to invert.
I do the big black areas with the adjustment layer after I get some halfway clean inks.
I'll do a screen grab of it tomorrow to clarify.
I've posted the screen grabs of my inking set up. Click the header to go to my other Blog
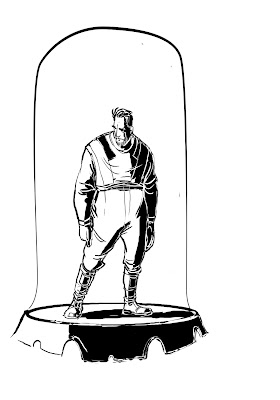
Hmm... Well, I don't quite understand the technique, but I love the "Man Under Glass" drawing. Maybe you should make a video of the process.
ReplyDeleteI think I'm doing more or less the same thing... white background layer, a sketch layer on top of that and an ink layer on top of that. ON the sketch layer I might draw in a different color, and when I'm ready to ink I drop the opacity of the sketch layer down around 50%. If I'm adding color I will sandwich it between the BG layer and the ink layer.
ReplyDeleteYeah. There is no right way to do anything in photoshop. If it works it's right. I'll cut and paste my screen grabs from the process to put up on my other blog sometime tonight
ReplyDeleteWhat sort of brush do you favor, Ellis?
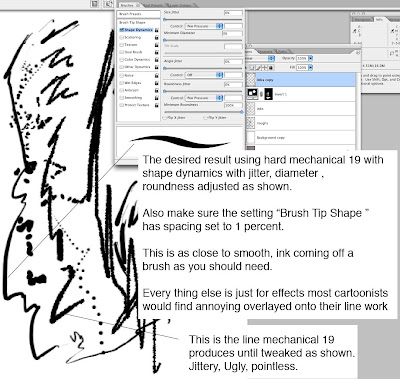
ReplyDeleteI'm still playing with my settings. I saved the one I used here after dabbling with it's settings.
ReplyDeleteIt has a bit of randomness to roundness that gives it a handmade flaw. Which I don't really need.
I usually start with the default hard round brush set in size as 19.
I'll post the settings in a graphic with a caption or two. Coming up
And after you've tweaked a brush, save it. Photoshop doesn't save your changes to the default brush. You have to save it and give it a new name.
ReplyDeleteCan you guys share your custom brushes??
ReplyDelete